How To Install And Setup A WordPress Multisite On Nginx
WordPress Multi-Site Installation & Nginx Configuration
Introduction
In this tutorial you will learn step by step how to install and setup a WordPress MultiSite running under Nginx Web Server.
Prerequisites
Before you move on with the installation and configuration of WordPress Multisite, you need to verify the following requirements are met:
- WordPress is already installed, and operating normally. If you don’t have it yet installed, follow the WordPress Installation tutorial.
- Pretty Permalinks are activated. This ensures SEO optimized url structure.
- All site’s plugins are deactivated.
- Root access to your server, or a non-root user with sudo privileges.
Step 1 – MultiSite Activation In wp-config.php
- Login to your webserver with SSH, and navigate to your site’s root folder. The first thing that we need to do, is to edit wp-config.php using
sudo vi wp-config.phpfile and add the variable below.define('WP_ALLOW_MULTISITE', true);It will look like this
$table_prefix = 'wp_'; /** * For developers: WordPress debugging mode. * * Change this to true to enable the display of notices during development. * It is strongly recommended that plugin and theme developers use WP_DEBUG * in their development environments. * * For information on other constants that can be used for debugging, * visit the Codex. * * @link https://codex.wordpress.org/Debugging_in_WordPress */ define( 'WP_DEBUG', false ); define('WP_ALLOW_MULTISITE', true); /* That's all, stop editing! Happy publishing. */ /** Absolute path to the WordPress directory. */ if ( ! defined( 'ABSPATH' ) ) { define( 'ABSPATH', dirname( __FILE__ ) . '/' ); } /** Sets up WordPress vars and included files. */ require_once( ABSPATH . 'wp-settings.php' ); - Save the file, and exit. MultiSite is now enabled, but you will have to enable the Network as well.
Step 2 – WordPress Network Installation
By creating a WordPress Network you have 2 choices.
- Use subdomains. To use a subdomain configuration, you must have a wildcard entry in your DNS. This usually means adding a
*hostname record pointing at your web server in your DNS configuration tool. The installer will attempt to resolve a random hostname (0f8c0d.admintuts.local) for your domain, and if the wildcard DNS record is not setup, it will result to an error message:cURL error 28. - Use subdirectories. Each site will appear in a sub-directory, which is not very pretty.
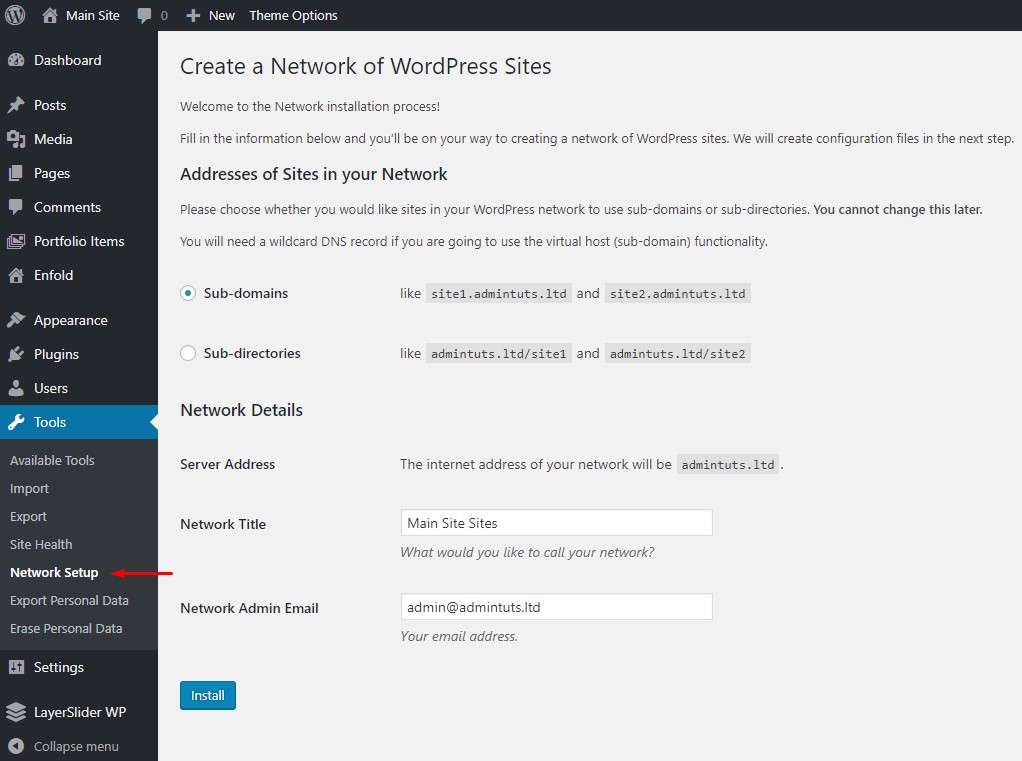
Create a Network of WordPress Sites Using Sub-Domains
Make your preferred selection, and fill out your details. Eventually Click on the Install button.
In the screen that will appear, you will be given with 2 instructions. The second one is to be ignored because is conserning Apache, while we use Nginx. All you have to do now is to:
- Add the following code to your
wp-config.phpfile in your site’s root directory, above the line reading/* That’s all, stop editing! Happy publishing. */define('MULTISITE', true); define('SUBDOMAIN_INSTALL', true); define('DOMAIN_CURRENT_SITE', 'admintuts.ltd'); define('PATH_CURRENT_SITE', '/'); define('SITE_ID_CURRENT_SITE', 1); define('BLOG_ID_CURRENT_SITE', 1); define('COOKIE_DOMAIN', $_SERVER['HTTP_HOST'] ); - Add the following to your domain’s config file in
/etc/nginx/sites-enabled/admintuts.conf:server_name admintuts.ltd *.admintuts.ltdif (!-e $request_filename) { rewrite /wp-admin$ $scheme://$host$uri/ permanent; rewrite ^/[_0-9a-zA-Z-]+(/wp-.*) $1 last; rewrite ^/[_0-9a-zA-Z-]+(/.*.php)$ $1 last; } - Add the following to
/etc/nginx/nginx.confwithin http section:map $http_host $blogid { default 0; #include /home/nikolas/admintuts.net/html_public/wp-content/uploads/nginx-helper/map.conf; }The reason that the include directive is commented, is because we will have to install a plugin named Nginx Helper.
- Restart Nginx with
sudo service nginx restart - Install Nginx Helper Plugin, and click on Enable Nginx Map.
- And lastly execute the command:
sudo touch /home/nikolas/admintuts.net/html_public/wp-content/uploads/nginx-helper/map.conf - Give ownership to the file using
sudo chown nikolas:nikolas /home/nikolas/admintuts.net/html_public/wp-content/uploads/nginx-helper/map.conf - Uncomment the include on the map directive in step 3, and then restart Nginx :
sudo service nginx restart
At this point when you visit your dashboard you will see something similar with the screen below:
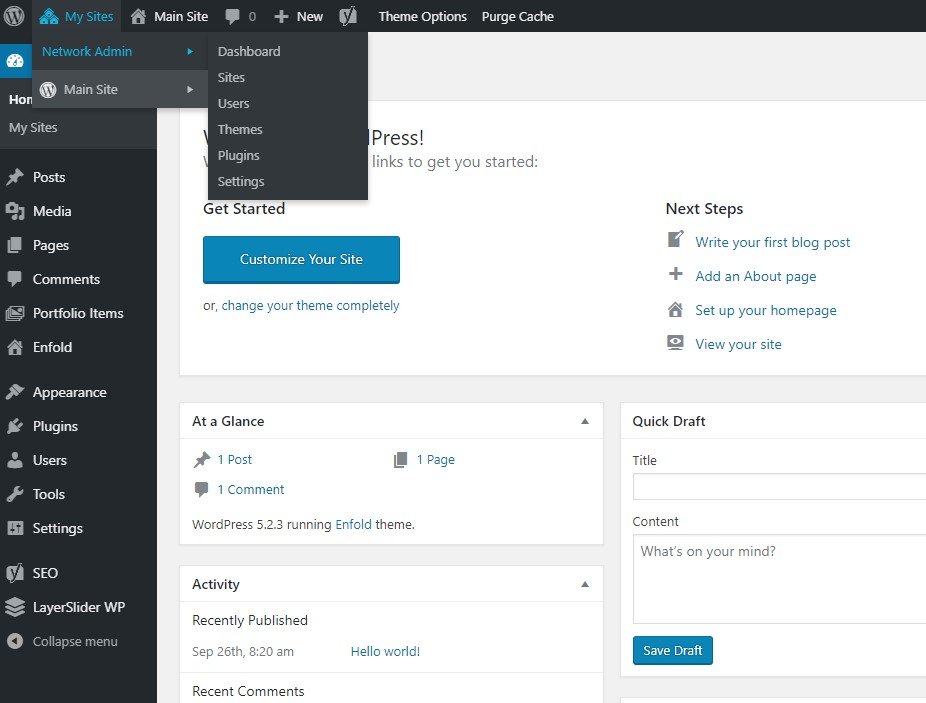
WordPress Network Administration
Also, when visiting Nginx Helper settings, you will see that your main site, assigned with the $blogid = 1.
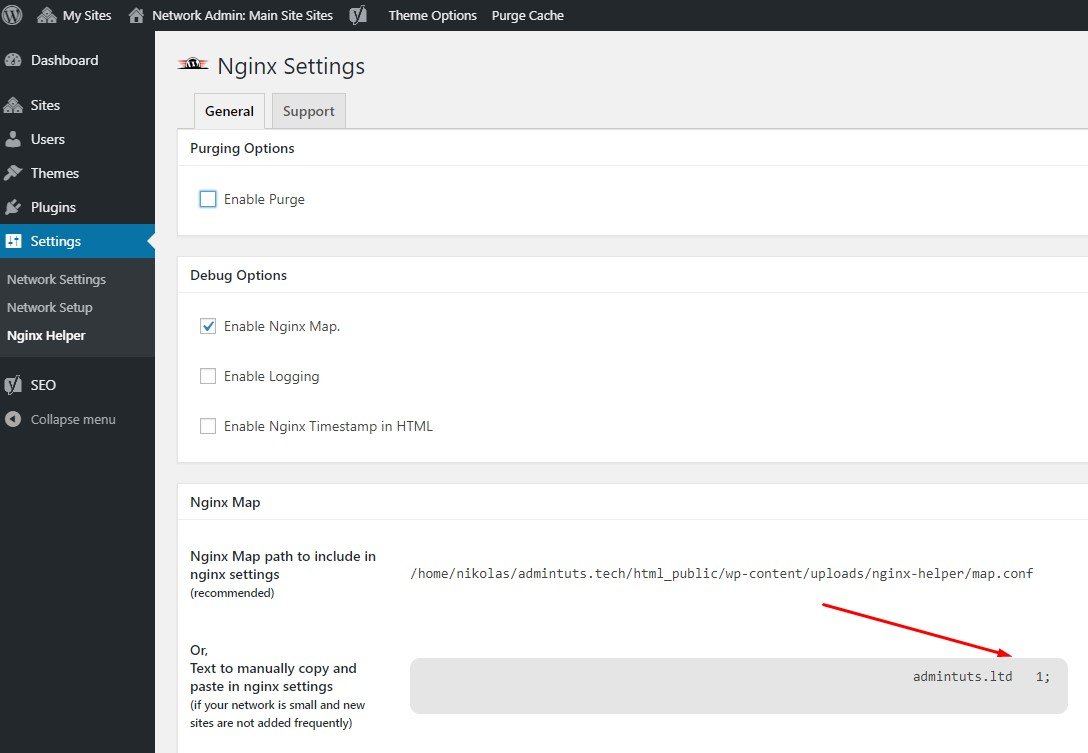
Nginx Map Multisite Settings
From now on, when you add new sites they will be given incremental ids.
Step 3 – Adding New Sites To The Network
Adding sites to the network can be done in Network Admin-> Sites
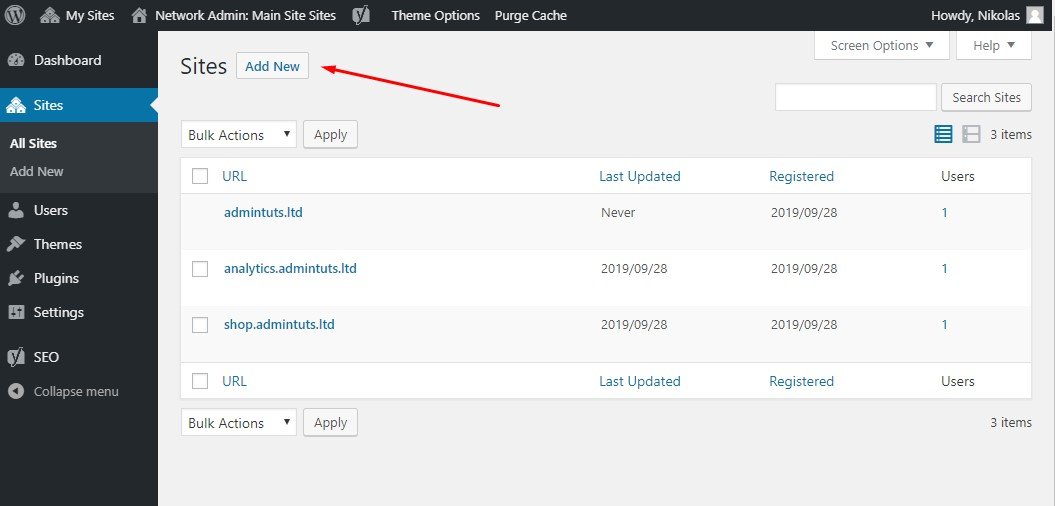
Adding New Sites To The WordPress Network
Step 4 – Domain Mapping
Lastly, the only thing that is left to be done so our websites are accesible through their own unique name, is to edit them and change their urls. Internally, Nginx will read the file map.conf, and will redirect the traffic the appropriate domains. Just make sure that you have setup your DNS entries having declared as IP Address, the ip address of the Main site.


Straight to the point tutorial, and fast. Thanks!
Thank you for helping people find the information they need. Good stuff as usual. Keep up the great work!!!