Introduction
Obs is known to be the leader in the online gaming and streaming world. It is a free and open-source software for video recording and live streaming. YouTubers and Twitch streamers are widely using it to provide high-quality streams to viewers and have a lot of customization options.
Essentials
- OBS Studio installed.
- Alternatively, you can use Streamlabs OBS.
Step 1 – Configuring Primary Website
On the primary site, you want to stream to, nothing changes. The configuration follows the same principle already known. Regardless though, we will configure OBS to stream firstly on YouTube, and secondly, on Twitch. The following steps are:
- File->Settings->Stream. In the “Service” dropdown menu, click on “Custom”, and paste the stream URL, and your stream key.

Enter your stream URL and stream key. - Now navigate to File->Settings->Output. Click on the “Streaming” tab and apply the settings you see below:
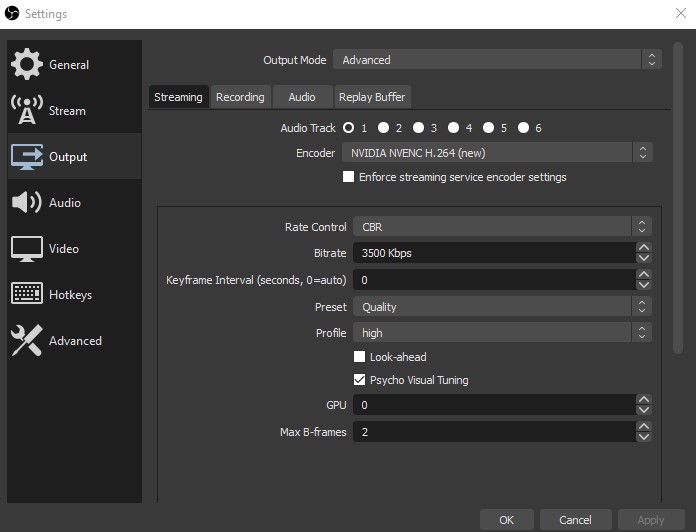
If you are using a newer Nvidia graphics driver, the option NVENC H.264(new) will be available. Alternatively, you can use Quick Sync if you have an Intel CPU that supports it. - Next, move on to File->Settings->Video. Choose the “Base Resolution” and “Output Resolution”.
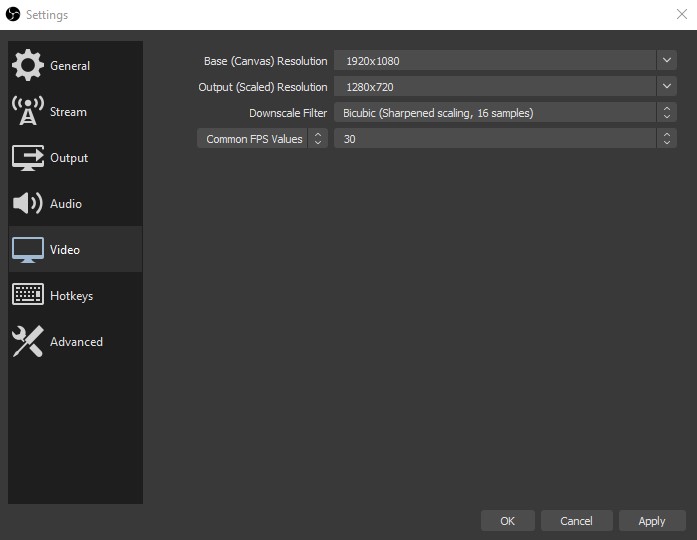
If you want to stream a video game, then set the Output Resolution to 1920×1080. If you want only to stream your webcam, then 1280×720 will suffice.
Step 2 – Configuring Secondary Website
Now we will configure Twitch as our secondary streaming site. We will use a trick that in reality we will be recording to an flv container.
- Go to File->Settings->Output. Click on the “Recording” tab and apply the settings you see below:
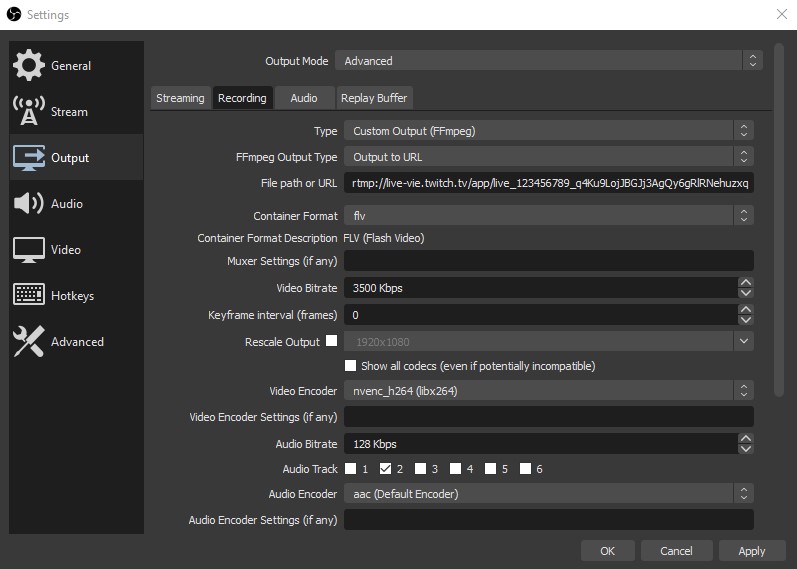
OBS will record to an flv container, essentially steaming it.
The File Path or URL, is the full streaming url having the format {stream-url}/{stream-key}
(Optional) – Using Virtual Cam Plugin
If you want to use OBS as a webcam capturing software using flash, you can use VirtualCam Plugin. After the installation, navigate to Tools->VirtualCam where you will see the options below:
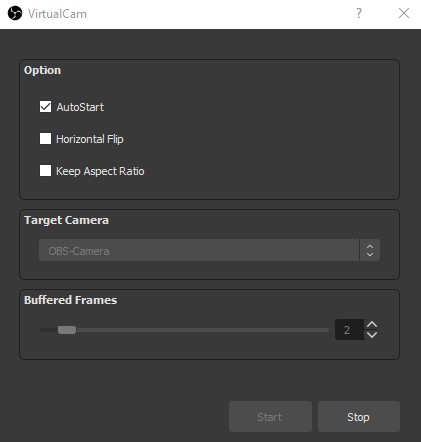
Keep in mind that when VirtualCam is running, you will have to stop it if you want to change OBS settings.
Begin Steaming
In the examples used above, we used YouTube and Twitch servers to stream to. Now you are ready to stream like so:
- Clicking the button “Start Streaming“, you will be streaming to your primary site (Youtube)
- Clicking the button “Start Recording”, you will be streaming to your secondary site (Twitch)
Of course, you are free to choose what every site you wish. The only thing that you should change is the stream URL and stream key.
Be aware that your internet connection should be enough to cover both streams. In our case, we used 3500kbps for each site. This means that OBS will be uploading data with a speed of 7000kbps. You should have a 10mbit upload connection to efficiently stream under these circumstances.