HOW TO CREATE A SCHEDULED TASK THAT SHUTS DOWN THE COMPUTER AT 11 PM EVERY WEEKDAY.
Introduction
Windows is an operating system that manages a variety of different tasks in the background, such as automatic updates and installed third-party software updates. There are occasions though, that you might want to automate a task that you are already doing manually. One of the most common of these tasks is shutting down the computer during the night. In this guide, you will learn how to close your computer every weekday.
In Windows, you can schedule any task to initiate automatically, using a utility that is called Windows Task Scheduler utility. Windows Task Scheduler is a Microsoft Management Console snap-in, which allows you to create a task that opens a program automatically according to a predefined schedule.
Windows Task Automation Steps
To configure Windows Task Scheduler follow the steps below:
- Use the keyboard combination “Windows Key” + “R” to open the “Run” utility, and type “taskschd.msc“. This will open Task Scheduler.
- From the menu panel, click “Action” -> “Create Task”.
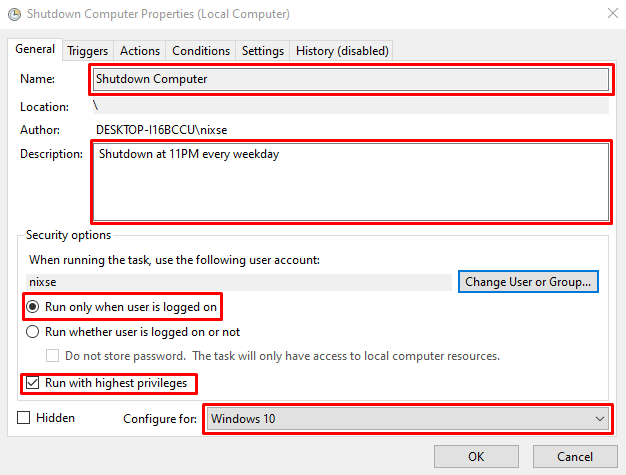
- In the pop-up window that opens, select the “General” tab. There are 5 fields that you will need to edit here as shown in the image below:
- Next, click on the “Triggers” tab, and click “New”. This tab defines when our “Shutdown Computer” task should be triggered. Adjust the trigger using the settings as appear in the picture below:
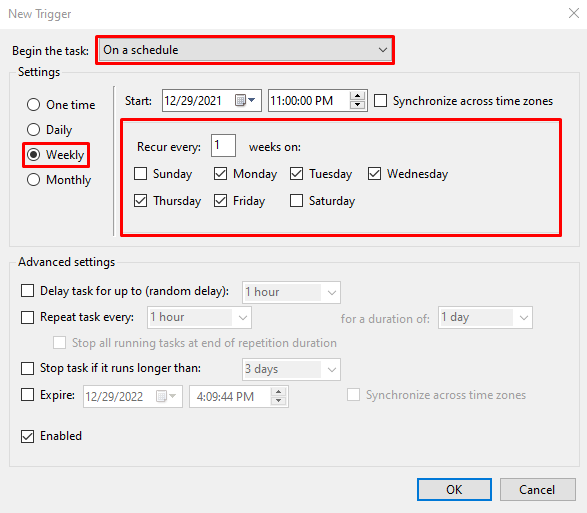
Click “Ok” to save the trigger.
Here we have chosen to run our task On a schedule every week, every day from Monday until Friday since we need this to run every weekday. - Next click on the “Actions” tab, and then “New”. A new window will pop up at which you will need to define a program to start. In our case, the program that needs to be executed is called shutdown.exe located at
C:\Windows\System32folder, as appearing in the image:
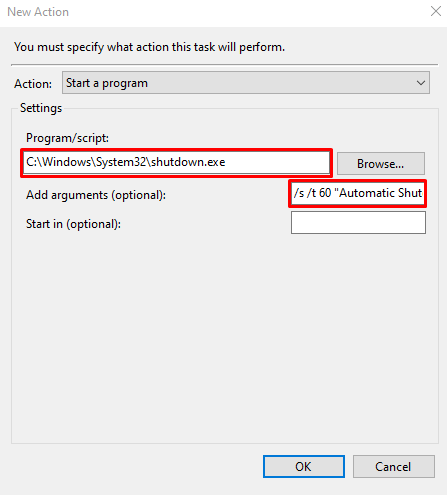
The “Add arguments” field contains a command that instructs the operating system to show a notification 60 seconds before the task execution. The entire command is:
/s /t 60 "Automatic Shutdown will occur in 60 seconds"Click “Ok” to save the Action.
- After, click on the “Conditions” tab, and make sure to uncheck the checkbox “Start the task only if the computer is on AC power” and enable the “Wake the computer to run this task” as illustrated below:

The “Start the task only if the computer is on AC power” needs to be unchecked to make sure that this task will be able to run on laptops that might not be connected with the AC power, but instead only using the battery.
Lastly, click “Ok” to save the entire Task, since there is no need to edit the “Settings” tab.
Now that the entire Task Scheduler process is completed, your task will look exactly like this:
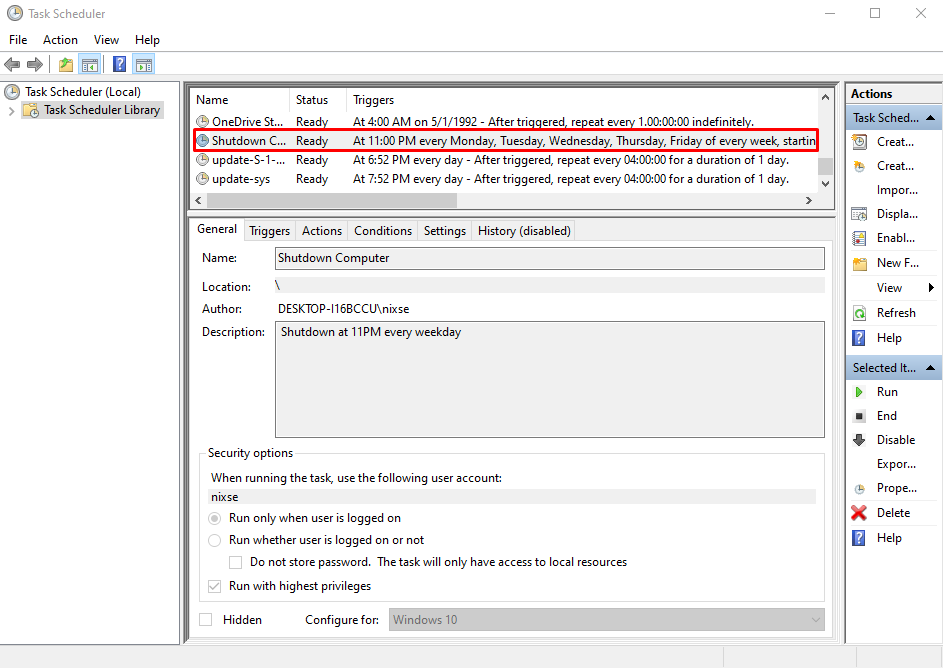
Your scheduled task has now been completed successfully, and your computer will automatically shut down every day at 11 pm excluding the weekends!